Showing posts with label Magnolias. Show all posts

Saturday, April 25, 2015

Tilda with her Little Lamb

Good morning everyone!  I hope you are having a wonderful weekend so far!  Before I get too far along in my post I would like to give a shout-out to my new friend Linda who I met at JoAnn's yesterday!  I was drooling over all the dies and other fun things I could use with my wonderful paper from the Paper Temptress store when we struck up a conversation and  were there talking for quite some time!  Is it just me or are crafters just the nicest people on the planet?!  I sure enjoy coming on here and sharing everyone's creativity and friendship.

Today's card is kind of Eastery...  which really isn't even a word, but the lamb in this image made me think of the cute lambs, chicks and ducks we usually have around Easter.  On the other hand Tilda (by Magnolias) sure looks a lot like Little Bo Peep taking her lamb out for a stroll on a bright Spring day!

 20150425_081254

I stamped my image onto Cryogen White and colored her with copics.  I stamped her dress onto some patterned paper, shaded it with copics, fussy-cut it out and glued it on.  I then fussy-cut Tilda and her lamb out to go onto this fun Spring scene.
All the other paper I used are from the Basis Cardstock Package and the Astrobright Colored Package.   I used 3 different shades of yellow to make the sunburst and using a die to cute it out made it sooo easy!   Taylored Expressions carries that die!  

The image below shows the different layers and how the butterflies and flowers are shaped.

20150425_081503

I hope you enjoy your weekend and that you get some crafting goodness time in!  

Saturday, March 14, 2015

Easter Tilda

Easter is right around the corner so I decided to make an Easter card to show you today.
The image I used is from Magnolias and her name is Tilda.  Isn't she cute?  I stamped her onto Heavenly White and colored her with copics.  I enjoyed coloring all her little Easter eggs in different colors.

20150313_232018

The background of the Easter egg is Lagoon.  The top and bottom decorative strip of paper is made out of Amethyst and the center strip is Pink from the Basis Pack.  

20150313_231854

As you can see in the photo below, the card is in the shape of the egg and opens up.  Tilda is popped up on pop dots and positioned in a way that her feet keep the card from rolling or falling over.

20150313_231907

Thank you for joining us today!  Hope you have a wonderful weekend!
Dies are by Spellbinders:  "Nested Eggs" and "A2 Bracket Borders One"

Saturday, February 21, 2015

I Give You My Heart

February is heart month and Congenital Heart Defects Awareness month so I am posting a card full of hearts!  


20150221_035100

I used Incandescent Rosso for the background and small red heart and I used Opal for the  frame, heart and "love" die cut.  I stamped Tilda onto Heavenly White cardstock and colored her with copics.  I stamped the dress onto a designer cardstock, fussy-cut it out and shaded it with copics.  

20150221_023904

I popped Tilda and the red heart up with pop dots to give the card some dimension.  

20150221_023917

Thank you for stopping by!  I hope you have a wonderful weekend!

Heart dies and oval frame by Spellbinders, "Love" by Stampin' Up!

Sunday, May 20, 2012

Princess Tilda in a Pink Dress

This is my 2nd post for today.  I made two projects for a tutorial for CropStop, I just posted the first one so either scroll down or click HERE.  The tutorial was published yesterday on CropStop's blog and can be found HERE.  I used Liquid Pearls on the other card and Star Dust Stickles on this one.  


I first colored Tilda with my copics, adding shading to her dress.


I then painted her dress and crown with Star Dust Stickles which made it shine.  Stickles and glitter glue are somewhat transparent so plan what color you want to show through before you do your painting.  Of course you can always paint on top of designer paper if you desire. 


Below is the card at an angle.  Lots of fun details!


As with the last project, I based my card on a sketch but alas that challenge just expired.  It's ok, I used a number of other challenges to base my card on.  
Here's the list:
Moxie Fab World: gingham challenge
Totally Tilda: Princess in Pink Dress
Simon Says Stamp and Show:  anything goes!
Creative Inspiration: Case it - I cased the colors pink, green & white 
Magnolia Down Under Challenge:  make your embellishments - metal corner - I embossed it with detail white embossing powder 
All That Scraps Blog:  Anything Goes
Papertake Weekly: In the Garden
Card Making Mamas: May Flowers
 Hotshot Craft Blog: use die cuts
Joyful Stamper: Anything Goes
Dies to Die for:  Anything Goes
Magnolia-licious Challenge: inspiration and color challenge-
Pink, Green and light yellow


Thank you for coming by!  Don't forget to hop on over to  CropStop and check out my little tutorial.  As always I appreciate each and every visit and comment.  Have a great week!


Fairy Tilda in Purple

I am so excited to share this project with you.  CropStop posted a tutorial I made about Painting with Liquid Pearls, Stickles and Glitter Glue.  Hop on over there and see it!  You'll be adding shimmer and shine to your projects in a new and fun way too!


I painted Tilda's wings in Lilac Liquid Pearls.  I also added some purple glitter glue to the large flower to add some shine.


By moving the card in the light the liquid pearls on the wings shine!


I made the butterflies using Martha Stewart's butterfly punch on some designer paper and added some bling to them.  


I used this gorgeous lace on the bottom and stamped "Dream" onto the tag... I embossed it with detail white embossing powder.


I originally made this card using a sketch but I wasn't able to post this in time and that challenge ended.  It's ok because I also made this for a number of other challenges - unfortunately one of those ended ONE HOUR ago.  I guess I should have saved the dishes until tomorrow, right?  hehe!

These are the challenges I'm entering this card into:
Simon Says Stamp and Show:  anything goes!
Magnolia Down Under Challenge:  make your embellishments - butterflies
7 Kids Challenge:  color me purple
All That Scraps Blog:  Anything Goes
Papertake Weekly: In the Garden
Card Making Mamas: May Flowers
 Hotshot Craft Blog: use die cuts
Joyful Stamper: Anything Goes
Dies to Die for:  Anything Goes

Thank you for coming by!  Don't forget to hop on over to  CropStop and check out the tutorial.  As always I appreciate each and every visit and comment.  Have a great week!

Thursday, March 15, 2012

Butterfly Tilda

*This is my 2nd post for the day.  If you are looking for MTME's Pretty Patterns challenge please scroll down or click here.*

I have a special butterfly card for you today.  I am posting this card in honor of my daughter this week at our CropStop challenge blog.  This week is our challenge is to use butterflies.  Do you think I have enough of them on my card?  hehe!


I love how shiny and pretty my liquid pearls are but they aren't just for dabbing spots anymore - I painted Tilda's wings with them!  It shines in certain light but doesn't when the light changes. 


Below is how the wings looked at an angle where the light wasn't shining directly on it.  


After I was finished with the pink liquid pearls I let it dry and then added the yellow.  The circles that you see in the image below were dotted on top of the pink background.  I let them completely dry before I glued down the paper pieced dress.  I popped her up on pop dots, placed her on top of the background I painted with copics and bent her wings up a bit.  I outlined the pink areas of the wings with a copic marker helping to make a definition between the shiny pink and shiny yellow liquid pearls.   


Here are a few more details including the butterflies I made with the Martha Stewart punches with some self-adhesive pearls. 


I had to add some flowers.  I put some diamond stickles onto the large pink flower.  The yellow flowers started out as white ones and I added a little color using my copics.  The green foliage was also made with a Martha Stewart punch.


The card is actually on top of the cardstock with the butterfly border.  The picture below shows how it opens.  


My daughter, Jessica, always loved butterflies.  Before she passed away she promised to send me butterflies from heaven and she sure does!  Just yesterday a large butterfly fluttered in front of my car and up and over it when I went to pick up my son from school.  We see them everywhere.  Jessica's favorite colors were pink and yellow so I tend to add those colors to my cards frequently but this card was just extra special so of course I had to have them as the main colors.  Now you see why I just had to dedicate this post to my sweet girl who is always with me  She is flying free, dancing and singing in heaven.  

Thank you so much for stopping by!  I appreciate each and every visit and comment!  Head on over to the CropStop challenge blog and play along with us this week by using some type of butterfly on your project or even make a card in a butterfly shape!  Don't worry, you don't have to use as many as me!  hehe!

When shopping at CropStop, don't forget to use the CropStop DISCOUNT code: NJCT-02 to receive 10% off - No minimum purchase required!  

Lastly, CropStop is having a special challenge in honor of National Craft Month.  You can read all the details Here.  


What's in it:

Other challenges:
Magnolia-licious: rainbow colors  
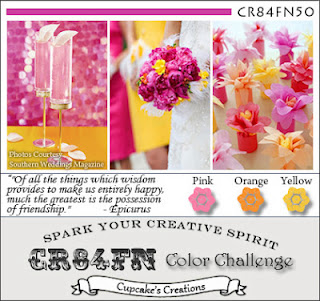
CR84FN #50 - inspiration photo

Die-Ing for a Challenge: Anything Goes
Crafty Sentiments Designs: Things with wings
Simon Says Stamp & Show:  Anything goes
Creative Inspirations: feminine (or for your mom or grandmother)
7 Kids College Fund  : Anything goes
Simon Says Stamp: A BIT o' green - green on pathway and leaves & greenery around flowers.
Wednesdays Challenge - anything goes

Thursday, July 21, 2011

Guest Designer spot with Tilda

I'm so excited to be a guest designer for Paper Crafting Journey today.  {If you are looking for my weekly post for My Time Made Easy's Pretty Patterns post, I'm afraid it will be late.  Between internet problems, photoshop problems (needed for the digi stamps) and not feeling well, I'm running behind schedule.  Thank you for your patience.}  In the meantime, let's talk about this fun card I made for Paper Crafting Journey's challenge!   This week's challenge is a sketch and a theme:  Go Girly!  Do you think my card is girly enough?  lol

(click on images to enlarge)

I used Tilda with Hawaiian flower.  I love the flower in her hair and all the butterflies around her.  My daughter loved butterflies too so this stamp makes me think of her and feel closer to her.   I stamped the dress onto the patterned paper, paper pieced it and adhered it to the image.  The rest of the image is colored with copics.  I added Diamond stickes on the dress, butterflies and flowers.  The photo below shows all the shiny goodness.


Lots of layers and embellishments on this card, which I love to use!


Thank you for stopping by!  Don't forget to check out the other designers on Paper Crafting Journey and join in the fun! 

Here's the sketch and remember, the theme is GO GIRLY!  


Other challenges I'm entering this card in:
Make it Monday
Really Reasonable Ribbon - cool it! 


I'll have another post for you later today (hopefully) with MTME's Pretty Patterns sketch challenge.


Thursday, March 24, 2011

Happy birthday Tilda!

Today I want to share another Tilda Birthday card.  She is holding a gift today and wearing bright colors.  I used My Time Made Easy's sketch... and they are doing a designer team call.  If you would like to apply for a sketch designer position you can play along and in the comments area mention that you are interested in being a designer.  Here's the sketch:

(as always click images to enlarge)

Instead of the square in the center I chose to use a circle with purple scallps behind it.  As you can see, Tilda's party hat extends beyond the circle. 

A few 3-d elements to my project.  


Hope you enjoyed your visit!  All comments are greatly appreciated. 

Friday, January 14, 2011

Gift-giving Tildas

It seems that blogger has "improved" it's program yet it seems to be making it harder for me to post my photos where I want and the way I want them.  hhhmmmm....  more time tryiing to post and less time crafting.  NOT what I really wanted to be doing.  But I do want to share this really cute card so I'm going to muddle through.

Here we have two Tildas - they must be twins - and one is giving the other a very special gift.


 I used the sketch for this card from the Sweet Sunday Sketch Challenge.  Below is this week's sketch. 


I was going to do this card something like the image below except for having Tilda in the center of the doily but then I got the idea to add another Tilda to the inside!


I really like the seeing the cute Tilda on the inside opening her gift.  If I had thought of this before coloring the girls, I would have made sure that the gifts were the same - but oh well!  Live and learn, right?


Here is the inside of the card.  I thought it would be really fun to adhere the circle that I cut out of the purple dotted paper to make the window behind the Tilda opening her gift.


I'm also submitting this card for the Magnolia-licious Highlights challenge which is:

*4 Flowers
*3 types of patterned paper 
*2 Magnolia images 
(any image by Magnolia qualifies/ ie. accessory, background, tilda/edwin, animal, sentiment, etc.)
*1 Ribbon

~~~~~~~~~~~~~~~~~~~

Another challenge I'm submitting this card for is Just Magnolias.
Their challenge is to use a Magnolia stamp and all your favorite things.  Well, I did!  I love Magnolia stamps, ribbon, flowers (the ones I used here are gems), die cuts, copics, sewing machine, a button... I don't know what more I could have added to this card!  

Thank you so much for stopping by!  I hope you enjoyed your stay.